You are standing in your garden, a rubber mallet in hand, tapping a new paver into place. It sits flush with its neighbors, level, solid. You step back, satisfied. Three weeks later, a summer thunderstorm hits. The water doesn’t soak in. It sheets across the surface, pooling in the center, and the next morning, that same paver is sitting three millimeters higher than the rest. You look at the edges, expecting to see a weed, a crack, a rotting base. There is nothing. The paver is perfectly intact. The soil beneath it is just… gone.
This is not settling. This is hydroplaning. And it is the single most common design failure in modern hardscaping, precisely because every paver manufacturer’s installation guide tells you to ignore it.
When a paver hydroplanes, the water pressure beneath the stone exceeds the friction holding it in place. The stone lifts, slides, and floats on a microscopic cushion of pressurized water until it finds a new resting spot. It is a physical phenomenon identical to a car tire losing contact with a wet highway at speed. Your garden path is not failing structurally. It is failing hydraulically.
The Hidden Drainage Failure
Standard paver installation dictates a specific layering sequence: a compacted sub-base of crushed stone, a bedding layer of coarse sand, and the pavers themselves. The instructions always emphasize compaction. “Compact the base to 98% Proctor density,” they say. “Screed the sand perfectly flat.” They never mention what happens to the water that cannot escape downward.
Water behaves differently when it is trapped. In a standard, perfectly sealed paver installation, rainwater hits the surface and has nowhere to go but sideways. It moves across the top, pooling in the lowest points. But a fraction of that water forces its way down through the joints, into the bedding sand. Because the underlying crushed stone base is compacted to near-impermeability, that water cannot drain further down. It hits a capillary break and spreads laterally, saturating the bedding layer until it is fully suspended.
When the saturation reaches a critical threshold, the water pressure beneath the paver exceeds the weight of the paver itself. The stone detaches from the sand. It floats. It slides. It hydroplanes.
This is why your pavers are shifting. It is a fundamental misunderstanding of water pressure in confined spaces. The paver maker’s guide assumes water will simply drain away. It does not. It accumulates. And when it accumulates, it turns your solid path into a raft.
Why Standard Installation Fails
Let’s look at the math. A standard 4×4 inch paver weighs about 8 pounds. The surface area is 16 square inches. If water pressure beneath that paver reaches just 0.5 pounds per square inch, the total upward force is 8 pounds. The paver is neutrally buoyant. It is floating.
Where does that 0.5 psi come from? It comes from the volume of water trapped in the bedding layer. A single inch of rainfall over a 100-square-foot path introduces roughly 62 gallons of water. If that water cannot drain downward, it has to go somewhere. It goes into the bedding sand. It saturates the sand. It builds pressure.
Standard installation guides ignore this because they assume a sloped surface. “Ensure a 2% slope away from structures,” they say. But a 2% slope is barely enough to move water across a vast, flat surface before it pools. And once it pools, it forces its way down. The slope moves water across the top, but it does not move water out of the base. The base remains saturated. The pressure builds. The pavers lift.
This is the hidden drainage failure. It is not visible during the first dry season. It reveals itself only when the rain comes, and by then, the damage is done. The pavers are already floating. They are already shifting. They are already hydroplaning.
The Paver Maker’s Blind Spot
Every major paver manufacturer in North America publishes an installation guide. I have read them all. They are identical in their core assumption: water drainage is a surface problem. They tell you to slope the path. They tell you to use jointing sand. They tell you to seal the surface. They never tell you to drain the base.
Why? Because the industry is built on volume. Selling more pavers is easier than selling more drainage infrastructure. A drainage layer adds cost. It adds labor. It adds complexity. It reduces the profit margin on the pavers themselves. So the industry ignores it. They sell you a product that will fail under normal weather conditions, and they sell you a repair kit when it does.
This is not malice. It is economics. The paver maker’s guide is designed to maximize the sale of pavers, not to ensure the longevity of the installation. It is a conflict of interest built into the instructions. They want you to install it their way, because their way is the cheapest way. And the cheapest way is the way that fails.
The Fix: Drainage Beneath the Base
1. The Permeable Base Layer
The first step to fixing hydroplaning is to stop compacting the base to 98% density. Instead, compact it to 90%. Leave it slightly porous. Allow water to pass through the base layer rather than forcing it to pool. This is a minor adjustment in compaction, but it changes the entire hydraulic behavior of the path. Water drains downward. It does not build pressure. The pavers stay grounded.
2. The Perforated Drain Pipe
If your path is large, or if your soil is clay-heavy, a porous base is not enough. You need a perforated drain pipe running along the lowest edge of the path. This pipe collects the water that drains through the base and carries it away. It is a simple, inexpensive addition that prevents saturation. It is also completely ignored by every paver manufacturer’s guide.
3. Open Joints, Not Sealed Joints
Most paver installations use polymeric sand to lock the joints. This sand hardens, creating a solid surface. It also traps water. If you want to prevent hydroplaning, use open joints. Leave the joints unsealed, or use a permeable jointing material that allows water to pass through. This gives the water an escape route. It reduces the pressure beneath the pavers. It prevents floating.
When Your Path Is Already Failing
If your pavers are already shifting, do not just reset them. They will shift again. The underlying problem is still there. The water is still pooling. The pressure is still building. You must fix the drainage. You must open the joints. You must install a drain pipe if necessary. You must stop compacting the base to 98% density.
Fixing the drainage fixes the hydroplaning. Fixing the hydroplaning fixes the shifting. It is a simple chain of cause and effect. But it requires you to ignore the paver maker’s guide. It requires you to do the work they tell you not to do. It requires you to understand that water is not your enemy. Poor drainage is.
Your garden path is not settling. It is hydroplaning. The hidden drainage failure is the only thing standing between your path and a lifetime of repairs. Fix it now, before the next storm.
FAQ
How do I know if my pavers are hydroplaning?
If your pavers shift after a heavy rain, but remain stable during dry periods, they are likely hydroplaning. Look for pavers that are slightly elevated, or that have moved out of alignment with their neighbors. If the shifting stops after the ground dries, hydroplaning is the cause.
Can I fix hydroplaning without tearing up the path?
You can mitigate it by opening the joints and installing a perforated drain pipe along the edge. However, if the base is already fully compacted and saturated, you may need to lift the pavers, loosen the base, and re-install it with a more porous layer. This is a labor-intensive fix, but it is the only permanent solution.
Does sealing pavers prevent hydroplaning?
No. Sealing pavers actually makes hydroplaning worse. It prevents water from entering the joints, forcing more water to pool on the surface and drain downward into the base, building pressure. If you seal your pavers, you are increasing the risk of hydroplaning.
What is the best slope for a paver path?
A 2% slope is the industry standard, but it is often insufficient for large paths or heavy rainfall. A 3% to 4% slope is more effective at moving water across the surface, reducing the amount that forces its way down into the base. However, slope alone does not fix hydroplaning. You must also address the drainage beneath the base.
Why do paver manufacturers ignore drainage?
Paver manufacturers ignore drainage because it adds cost and complexity to the installation. Selling more pavers is more profitable than selling drainage infrastructure. The installation guides are designed to minimize the cost of installation, not to maximize the longevity of the path.
Sources & Further Reading
- Interstate Pavers Installation Guidelines — Interstate Pavers
- Concrete Paver Installation: Design and Construction — Pavement Interactive
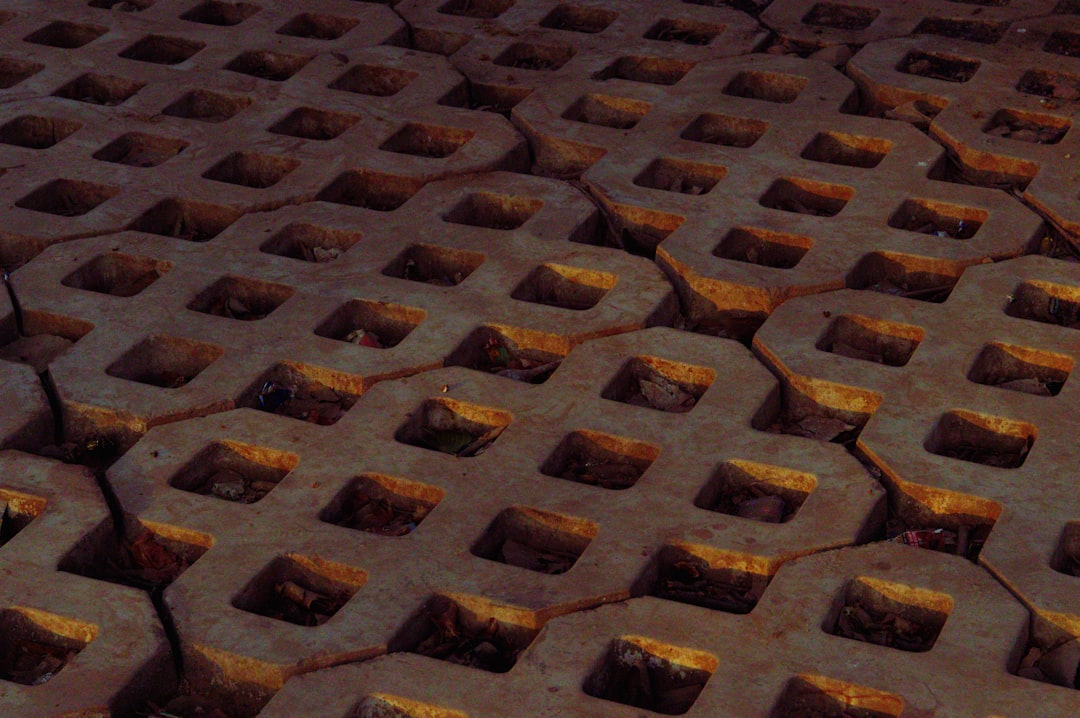
Photo by Harshit Katiyar on Unsplash.