You bought a bag of premium potting mix, filled a container, planted your dahlia tuber, and watered it in. Two weeks later, the leaves are yellowing, the stem base is soft, and you are staring at a plant that is slowly drowning in soil that was supposed to be perfect. This is not your fault. Standard potting mixes are engineered for tropical houseplants and leafy annuals, not for the massive, water-hungry tuberous root system of a dahlia. When you use standard soil in pots, you are creating a sponge that holds water exactly where the tuber needs to breathe. The result is not a lack of care, but a fundamental mismatch between the plant’s anatomy and the soil’s physics.
There is a specific drainage rule for container-grown dahlias that solves this problem completely. It does not involve watering less, and it does not involve buying expensive specialty soil. It involves changing the physical structure of the potting medium to mimic the fast-draining, mineral-rich slopes of the dahlia’s native habitat in Mexico and Central America. By swapping the organic components of standard potting mix for a high-volume inorganic grit, you create a root zone that flushes excess water instantly, preventing the crown rot that kills 90% of container dahlias in their first season.
Why Standard Potting Mix Drowns Dahlias
Standard bagged potting mix is designed to hold water. It is a blend of peat moss, pine bark, and vermiculite, sometimes with added slow-release fertilizer. For a peace lily or a pothos, this is ideal. For a dahlia, it is a slow-acting poison. Dahlias grow from tuberous roots, which are swollen, fleshy storage organs that function much like sweet potato tubers rather than true bulbs or corms. These tubers are highly susceptible to rot when they sit in wet, anaerobic soil for more than a few days.
When you plant a dahlia tuber in standard potting mix, the peat and bark components absorb water like a sponge. Because the pot is a closed container, that water has nowhere to go. The soil stays wet for days, sometimes weeks, depending on your climate and watering habits. The dahlia tuber, which requires a dry-to-moist cycle to trigger growth, sits in stagnant water. The result is crown rot, a fungal and bacterial infection that starts at the base of the stem and moves downward, killing the entire plant from the inside out. This is why gardeners often blame themselves for overwatering, when the real problem is the soil’s inability to drain fast enough to keep the tuber dry between waterings.
The solution is not to water less. The solution is to change the soil so that water passes through it instantly, leaving just enough moisture for the roots without creating a saturated environment. This is the core of the tuberous root drainage rule.
The 3:2:1 Inorganic Potting Mix Rule
The most effective soil mix for container dahlias is a simple, three-component blend that prioritizes drainage over water retention. This mix is often called the 3:2:1 rule, and it works because it replaces the water-holding peat and bark with inorganic grit that provides structure and airflow. The ratio is three parts inorganic grit, two parts organic compost, and one part slow-release fertilizer. Here is exactly how to build it, and why each component matters.
Part 1: The Grit (Three Parts)
The grit is the most important part of the mix. It provides the physical structure that allows water to drain instantly. Use a blend of coarse horticultural perlite, pumice, or coarse builder’s sand. Avoid fine sand, which can compact and reduce drainage. The goal is to create a soil that is 50% to 60% air space by volume. When you squeeze a handful of this mix, it should fall apart, not hold its shape. This high air space ensures that oxygen reaches the tuberous roots, which is critical for preventing rot and encouraging vigorous growth.
Part 2: The Compost (Two Parts)
Compost provides the nutrients and the minimal water retention that the dahlia needs. Use a high-quality, well-aged compost, such as mushroom compost or worm castings. Avoid raw manure or fresh compost, which can burn the tender roots of a young dahlia. The compost should be sifted to remove large chunks of wood or debris, ensuring a smooth, consistent texture that allows the tuber to push through easily as it sprouts.
Part 3: The Fertilizer (One Part)
Dahlias are heavy feeders, especially when grown in containers where nutrients leach out with every watering. Use a slow-release, balanced fertilizer with an NPK ratio of 5-10-10 or 10-10-10. Avoid high-nitrogen fertilizers, which encourage leafy growth at the expense of flowers and tuber development. Mix the fertilizer thoroughly into the soil before planting to ensure even distribution. Do not place the fertilizer directly against the tuber, as this can cause chemical burn.
How to Plant Your Dahlia Tuber in the Mix
Once you have your 3:2:1 mix ready, planting the dahlia tuber is straightforward. Choose a container that is at least 12 to 15 inches deep and 12 to 15 inches wide. Larger containers hold more soil, which buffers against temperature fluctuations and reduces the frequency of watering. Ensure the container has drainage holes, and place a layer of gravel or broken pottery shards at the bottom to prevent clogging.
Fill the container about one-third full with your 3:2:1 mix. Place the dahlia tuber horizontally on top of the soil, with the eye (the sprouting point) facing up. Cover the tuber with 2 to 3 inches of soil. Do not bury it deeply at this stage. Dahlias need warmth to sprout, and a shallow planting allows the soil to warm up faster in the spring. As the stem grows, you can gradually fill in the container with more mix, a process called hilling, which encourages more root growth and stabilizes the plant.
Water the tuber thoroughly after planting, but do not keep the soil constantly wet. Allow the top inch of soil to dry out between waterings. This dry cycle is crucial for triggering the tuber to send out roots. Once the first shoots emerge, you can increase the watering frequency slightly, but always ensure the soil drains completely before watering again.
When to Stop Hilling and Start Feeding
Hilling is the process of adding more soil around the stem as it grows. For container dahlias, you should stop hilling once the stem reaches about 6 to 8 inches tall. At this point, the tuber has established its root system, and further hilling provides no additional benefit. Instead, focus on feeding. Dahlias are heavy feeders, and container-grown plants deplete nutrients quickly. Apply a liquid fertilizer high in phosphorus (the middle number in the NPK ratio) every two weeks once the first buds appear. This encourages large, vibrant blooms and strengthens the tuber for next year’s storage.
As the season progresses, monitor the soil moisture closely. In hot weather, container soil can dry out quickly, even with a gritty mix. Check the soil daily by inserting your finger an inch into the pot. If it feels dry, water deeply until water runs out of the drainage holes. If it feels moist, wait. Overwatering is the number one cause of failure in container dahlias, so err on the side of underwatering rather than overwatering.
Harvesting and Storing Your Tuber
When the first frost hits, your dahlia will die back. This is the signal to harvest the tuber. Cut the stems back to 4 to 6 inches above the soil. Gently dig up the tuber, being careful not to damage the fleshy roots. Shake off excess soil and let the tuber dry in a cool, ventilated area for 24 hours. This drying process helps seal any wounds and prevents rot during storage.
Store the tuber in a cool, dark place, such as a basement or a refrigerator, at a temperature of 40 to 45 degrees Fahrenheit. Place the tuber in a paper bag or a cardboard box with a small amount of peat moss or sawdust to maintain humidity without creating moisture. Check the tuber monthly for signs of shriveling or rot. If it shrivels, mist the peat moss lightly. If it shows rot, cut away the affected area and dust the wound with sulfur powder before re-storing.
By following the 3:2:1 inorganic potting mix rule, you give your dahlia the exact environment it needs to thrive in a container. The high drainage prevents crown rot, the balanced nutrients encourage large blooms, and the careful watering schedule ensures the tuber stays healthy year after year. This is not a matter of luck or green thumbs. It is a matter of understanding the plant’s anatomy and providing the soil structure that matches it.
Frequently Asked Questions
Can I use coco coir instead of peat moss in the 3:2:1 mix?
Yes, you can substitute coco coir for peat moss. Coco coir is more sustainable and has a more neutral pH, but it holds more water than peat. If you use coco coir, increase the amount of grit slightly to compensate for the extra water retention. The goal is still a 50% to 60% air space by volume.
How often should I water a container dahlia?
Water when the top inch of soil feels dry. In hot weather, this may be every day or every other day. In cooler weather, it may be once a week. The key is to let the soil dry out between waterings, rather than keeping it constantly moist.
What is the best fertilizer for container dahlias?
Use a balanced, slow-release fertilizer with an NPK ratio of 5-10-10 or 10-10-10. Once the first buds appear, switch to a liquid fertilizer high in phosphorus to encourage large blooms.
Can I grow a dahlia in a small pot?
You can, but it is not recommended. Dahlias have large tuberous root systems that require space. Smaller pots dry out too quickly and provide less buffering against temperature fluctuations, which can stress the plant and reduce bloom size.
How do I know if my dahlia tuber is rotting?
Signs of rot include a soft, mushy stem base, yellowing leaves, and a foul odor. If you suspect rot, dig up the tuber and inspect it. Cut away any soft, discolored areas with a clean knife, and dust the wound with sulfur powder before re-storing. If the rot has spread to the entire tuber, the plant is lost.
Sources & Further Reading
- Dahlias: Growing and Exhibiting — Penn State Extension
- Growing Dahlias in Containers — Royal Horticultural Society
- Dahlias: Planting and Care — University of Maryland Extension
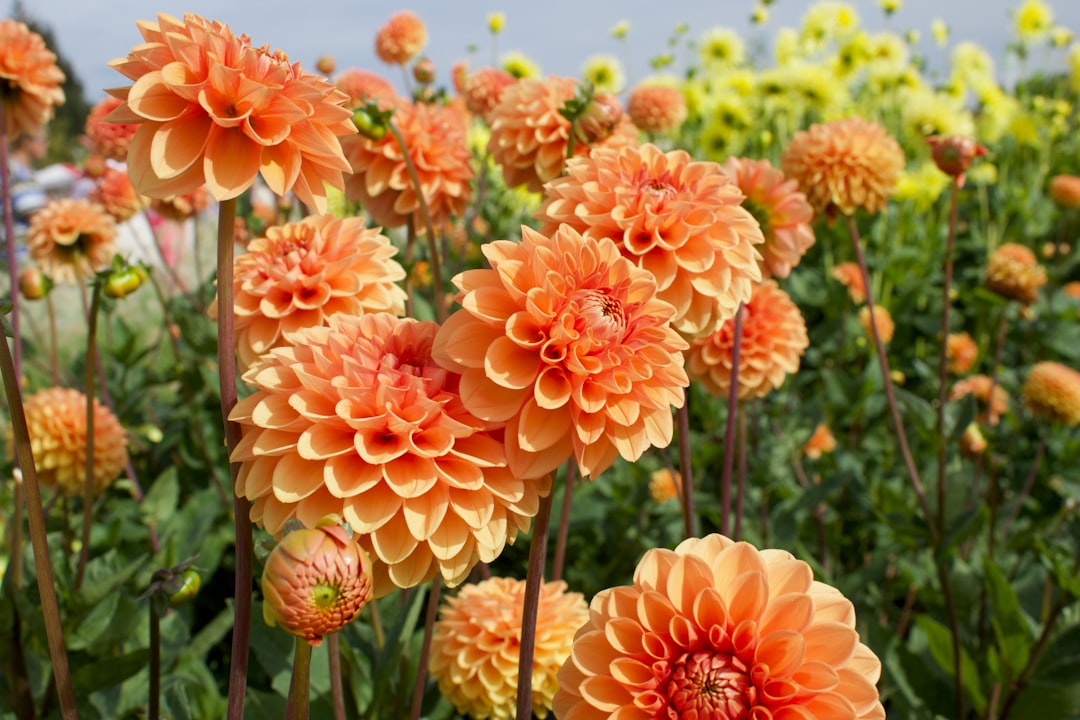
Photo by Timo C. Dinger on Unsplash.